I always wanted to get more familiar with Raspberry Pi and Kubernetes. In December during my time off, I finally bought a Pi and experimented few things. One such experiment was to run ASP.NET core web application on Raspberry Pi. This was a fun experiment and I definitely learned more about Raspberry Pi, Kubernetes, ASP.NET core, Traefik, Docker and associated technologies. In this post, I would describe the steps that are required to run ASP.NET web app on Pi.
Create ASP.NET core web application
Platform: Windows, Tools: Visual Studio 2019
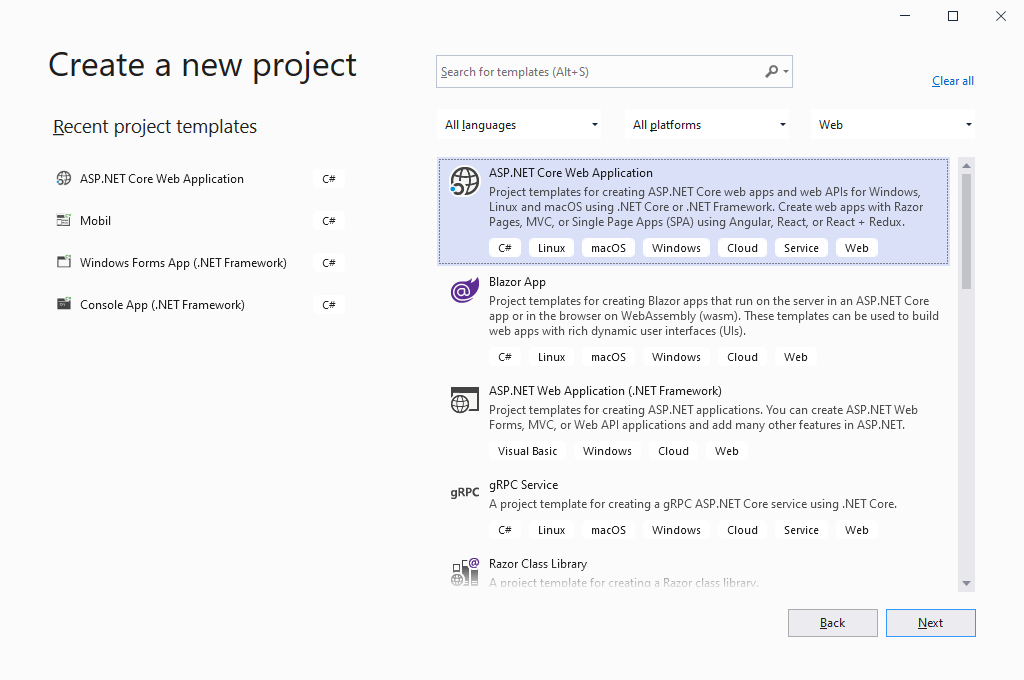
The process for creating a basic ASP.NET core web application is shown below. It has following steps:
- Create a new project in Visual Studio (I used Visual Studio 2019)
- Select ASP.NET Core Web Application
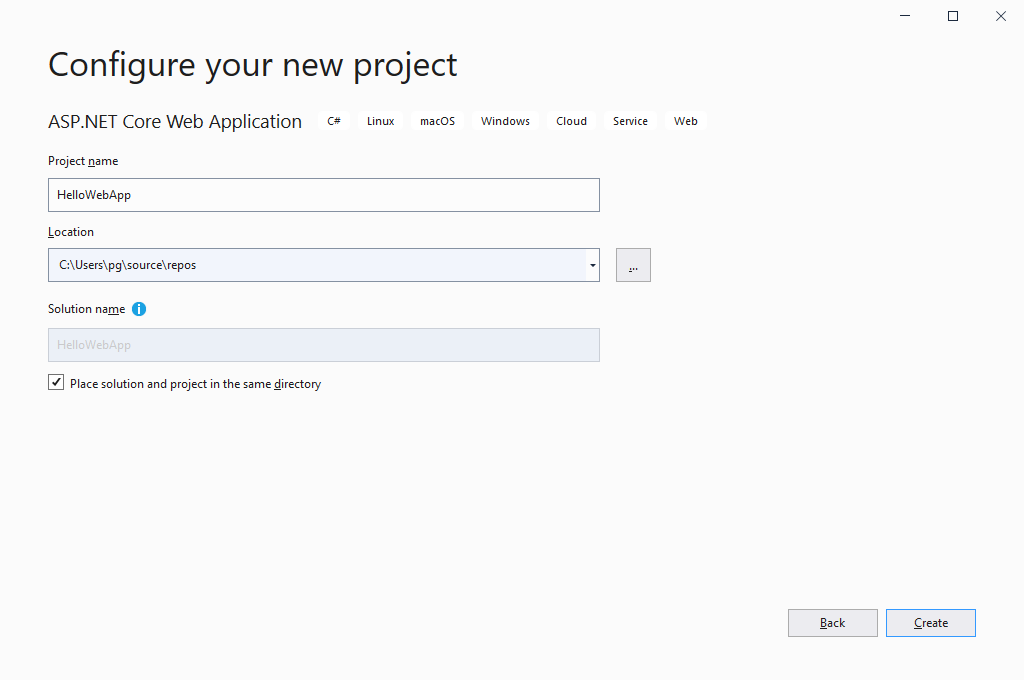
- Give it a name (I gave the name HelloWebApp)
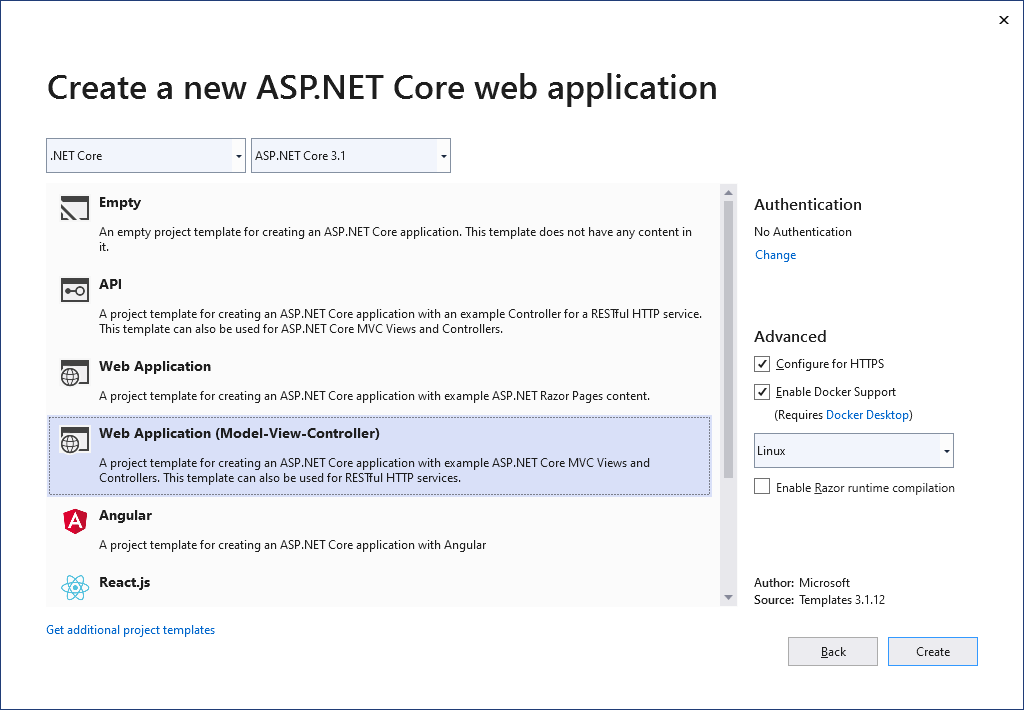
- Select Web Application (Model-View-Controller) (You can use different type as well)
- In Advanced section, select Enable Docker Support and Linux in the drop down below that.
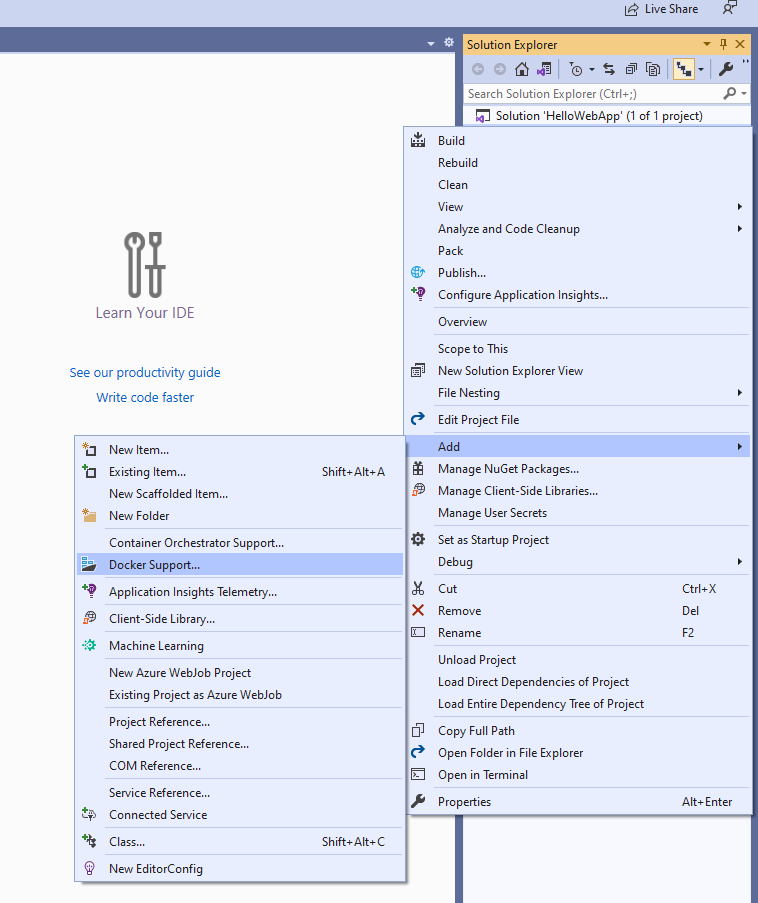
- Right click on project, select Add and choose Docker Support.
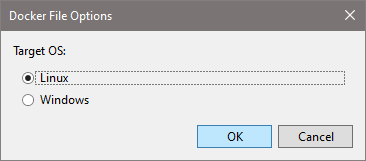
- Select Target OS as Linux
- This will generate a Dockerfile in the project
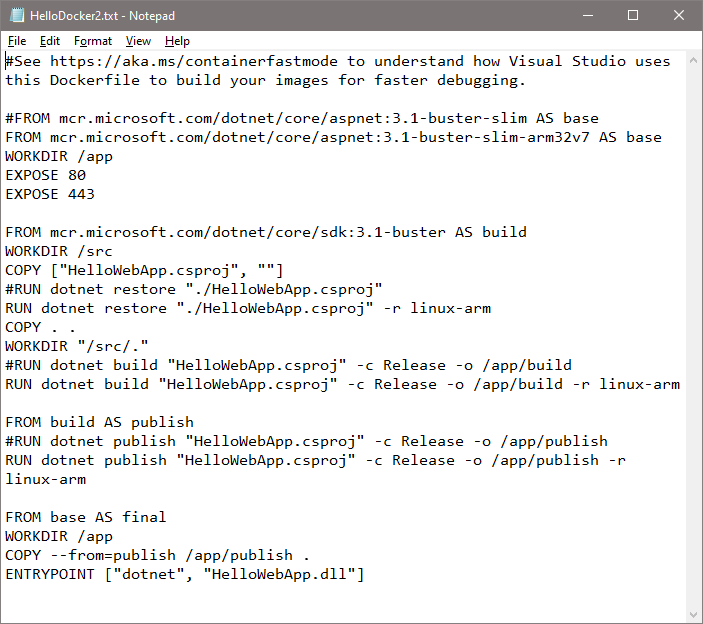
- Update docker file to use ARM architecture
- The changes are shown in image 6 where older lines are commented with # and new lines are added below it.
- For example:
- #FROM mcr.microsoft.com/dotnet/core/aspnet:3.1-buster-slim AS base
- FROM mcr.microsoft.com/dotnet/core/aspnet:3.1-buster-slim-arm32v7 AS base
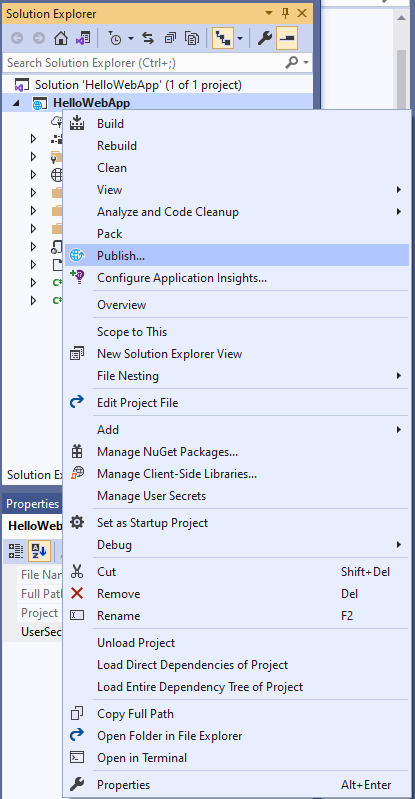
- After that build the solution, right click on project and select publish
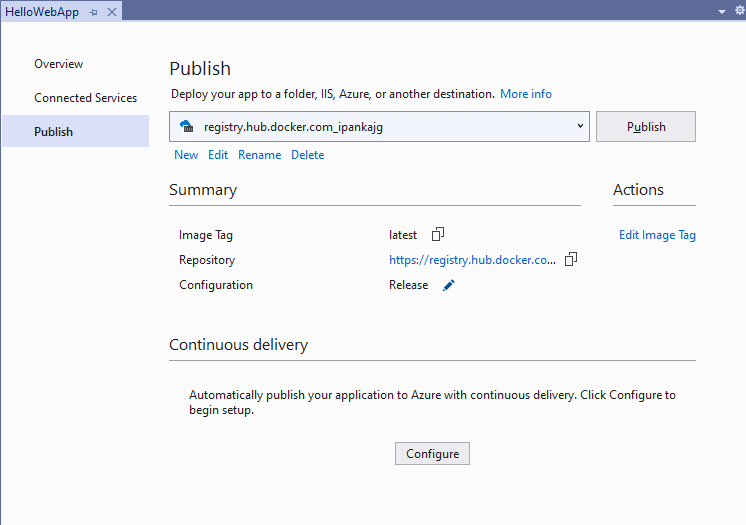
- Provide information about your docker hub account etc. and click publish
The whole process is shown in the images below as well.
Install Kubernetes
Platform: Raspberry Pi, Tools: k3s
I used k3s for Kubernetes as it seems to be the commonly used lightweight Kubernetes based distribution suitable for Raspberry Pi. SSH into your Raspberry Pi and run following command to install Kubernetes:
curl -sfL https://get.k3s.io | INSTALL_K3S_VERSION=v1.19.5+k3s2 sh -s - --write-kubeconfig-mode 644 --disable=metrics-server
I used specific version because newer version of k3s had some stability issues as mentioned here: https://github.com/k3s-io/k3s/issues/2798
I also use –write-kubeconfig-mode, this allows running kubectl without requiring sudo.
Finally I had to use –disable=metrics-server because I was having some problem deleting namespaces without it.
As I didn’t need metrics for this experiment, I didn’t spend time debugging it either. You may want to try without disabling metrics-server though and disable it only if you hit problems.
Enable Traefik Dashboard
k3s uses Traefik as reverse proxy for routing incoming traffic to the pods. To enable Traefik dashboard, I needed to do following:
kubectl -n kube-system edit cm traefik
This will open up a VIM window with configuration for Traefik. In that, add the lines as commented below and save it using :wq
# Traefik configuration (partial snippet shown below).
 [ping]
   entryPoint = "http"
   [kubernetes]
     [kubernetes.ingressEndpoint]
     publishedService = "kube-system/traefik"
   [traefikLog]
     format = "json"
   # Add these two lines and save it using :wq
   [api]
     dashboard = true
Scale Traefik in and out to make configuration change take effect:
kubectl -n kube-system scale deploy traefik --replicas 0
kubectl -n kube-system scale deploy traefik --replicas 1
Once this is done, Traefik dashboard should be active. You need one more step before you can view the dashboard:
kubectl -n kube-system port-forward deployment/traefik 8080
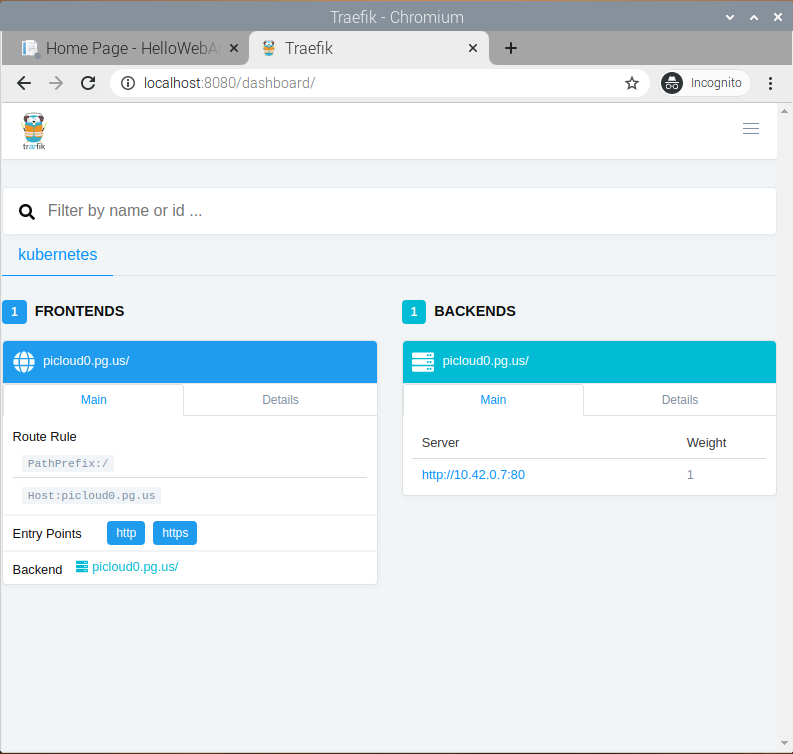
Now you can go to http://localhost:8080/dashboard and see the Traefik dashboard. Dashboard looks something like as shown below, but initially FRONTENDS and BACKENDS would be blank and once we are done with deploying our HelloWebApp, it would look similar to picture below.
Create FQDN for localhost
Create a FQDN for localhost by adding following line to /etc/hosts
Note: I used the name picloud0.pg.us. You can use a different name. Just make sure you update the name correctly in all the files used in this tutorial.
127.0.0.1 picloud0.pg.usDeploy HelloWebApp application
1. Create a new namespace
kubectl create namespace aspnetcore0
2. Create Yaml file for web application
#Create file hellowwebapp.yml
apiVersion: apps/v1
kind: Deployment
metadata:
  name: hellowebapp
  namespace: aspnetcore0
spec:
  replicas: 1
  selector:
    matchLabels:
      app: hellowebapp
  template:
    metadata:
      labels:
        app: hellowebapp
    spec:
      containers:
      - name: hellowebapp
        image: ipankajg/hellowebapp:latest
        ports:
        - containerPort: 80
---
apiVersion: v1
kind: Service
metadata:
  name: hellowebapp
  namespace: aspnetcore0
spec:
  ports:
  - name: http
    port: 80
  selector:
    app: hellowebapp
---
apiVersion: networking.k8s.io/v1
kind: Ingress
metadata:
  name: hellowebapp
  namespace: aspnetcore0
  annotations:
    kubernetes.io/ingress.class: traefik
spec:
  rules:
  - host: picloud0.pg.us
    http:
      paths:
      - path: /
        pathType: Prefix
        backend:
          service:
            name: hellowebapp
            port:
              number: 80
3. Deploy the application
#Deploy application in aspnetcore0 namespace
kubectl -n aspnetcore0 apply -f hellowebapp.yml
4. Verify the application deployment
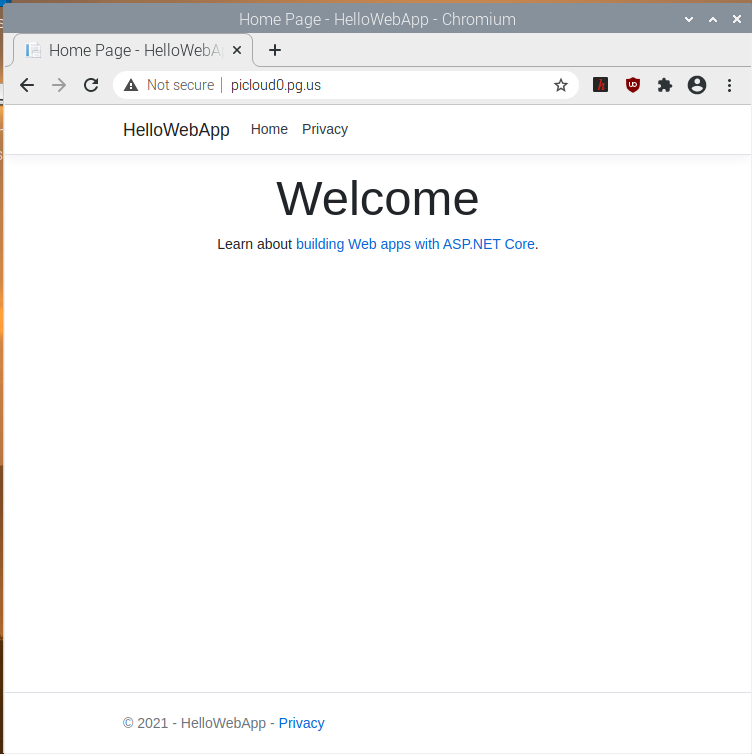
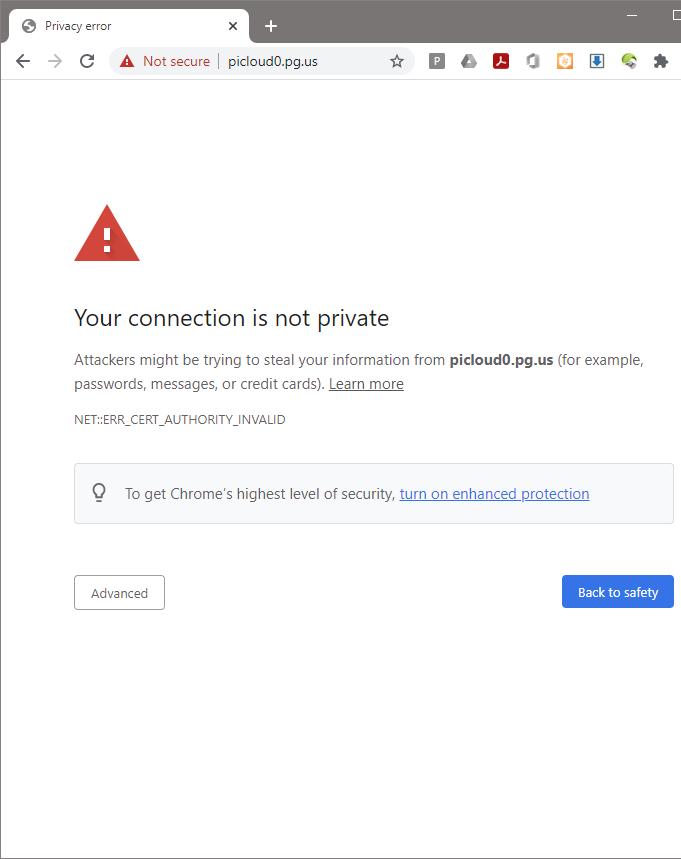
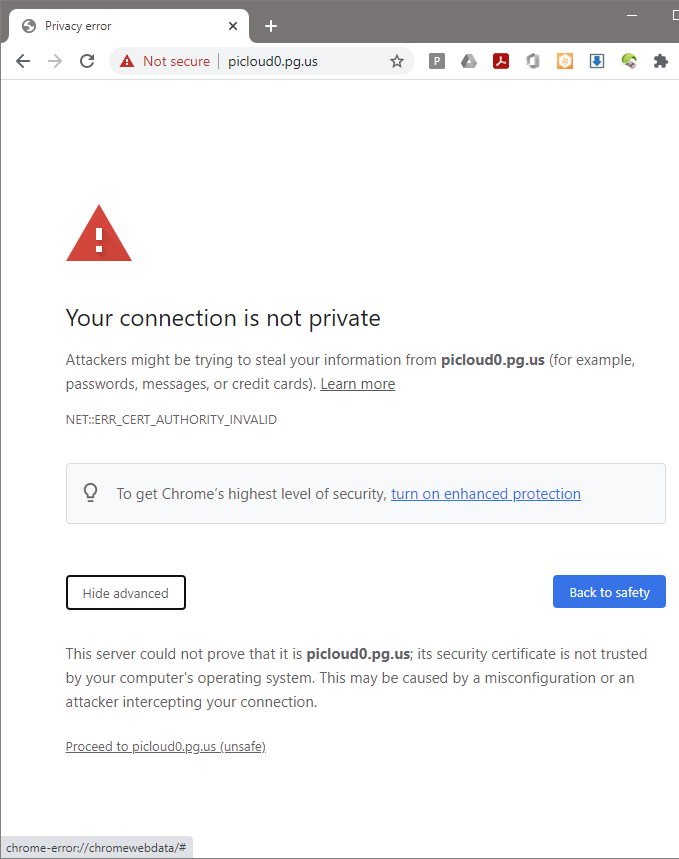
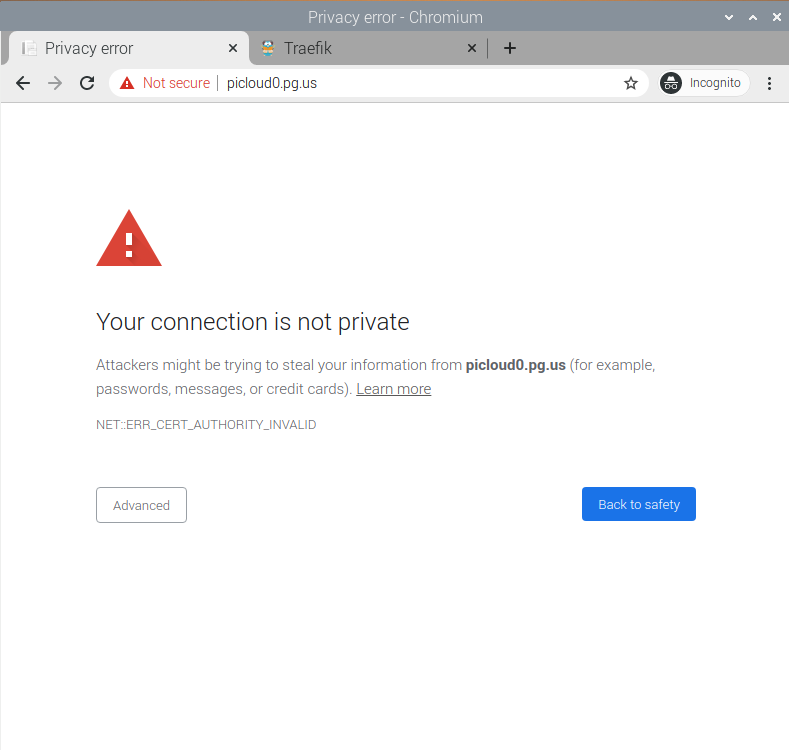
Go to http://picloud0.pg.us and see that webpage is served (as shown below). You can also try https://picloud0.pg.us but you would get security warning as certificate is invalid as Traefik supplies some default example.com certificate.

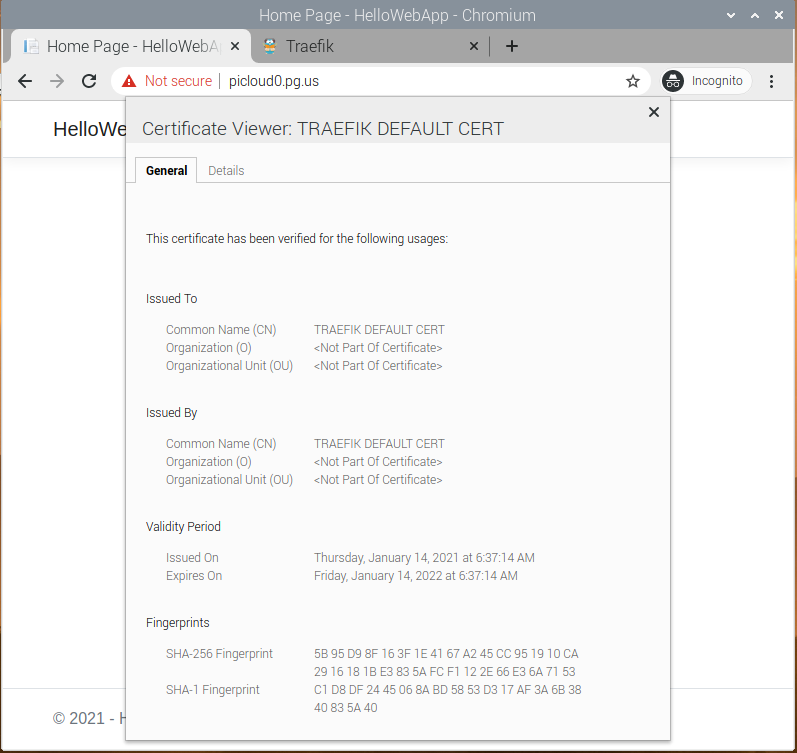
Use Traefik generated self-signed certificate
You can also make Traefik generate a self-signed certificate if that works for your use case. This can be done by editing the configuration of Traefik and commenting out the default certificate.
kubectl -n kube-system edit cm traefik
  traefik.toml:
    # traefik.toml
    logLevel = "info"
    defaultEntryPoints = ["http","https"]
    [entryPoints]
      [entryPoints.http]
      address = ":80"
      compress = true
      [entryPoints.https]
      address = ":443"
      compress = true
        [entryPoints.https.tls]
          #The following 3 lines needs to be commented out
          #[[entryPoints.https.tls.certificates]]
          #CertFile = "/ssl/tls.crt"
          #KeyFile = "/ssl/tls.key"
kubectl -n kube-system scale deploy traefik --replicas 0
kubectl -n kube-system scale deploy traefik --replicas 1
At this point, you should see that the certificate served by the website has changed to a Traefik generated certificate instead of example.com certificate.
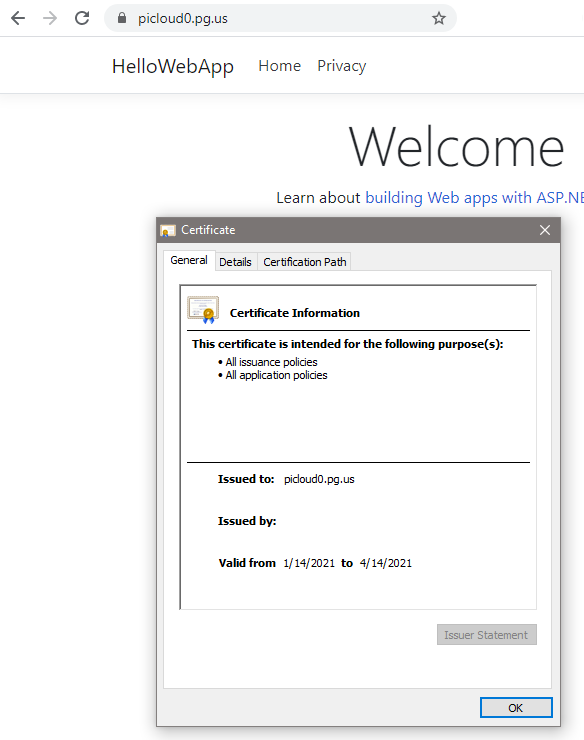
Final: Generate self-signed certificate for picloud0.pg.us
1. Install cert-manager for the cluster
#Install cert-manager
kubectl apply -f https://github.com/jetstack/cert-manager/releases/download/v1.1.0/cert-manager.yaml
2. Create a certificate issuer spec to issue self signed certificates
#Create a file selfSigned-issuer.yml with this content
apiVersion: cert-manager.io/v1
kind: ClusterIssuer
metadata:
  name: selfsigned-issuer
spec:
  selfSigned: {}
## Create selfsigned issuer for the cluster
kubectl apply -f selfSigned-Issuer.yml
3. Modify application spec to include certificate generation
Next we need to modify hellowebapp.yml so a self signed certificate is issued automatically by cert manager. This is done by adding a cluster-issuer line and tls section in the application deployment yaml spec.
#File hellowebapp.yml
apiVersion: apps/v1
kind: Deployment
metadata:
  name: hellowebapp
  namespace: aspnetcore0
spec:
  replicas: 1
  selector:
    matchLabels:
      app: hellowebapp
  template:
    metadata:
      labels:
        app: hellowebapp
    spec:
      containers:
      - name: hellowebapp
        image: ipankajg/hellowebapp:latest
        ports:
        - containerPort: 80
---
apiVersion: v1
kind: Service
metadata:
  name: hellowebapp
  namespace: aspnetcore0
spec:
  ports:
  - name: http
    port: 80
  selector:
    app: hellowebapp
---
apiVersion: networking.k8s.io/v1
kind: Ingress
metadata:
  name: hellowebapp
  namespace: aspnetcore0
  annotations:
    #Add this line to use selfSigned-issuer for our certificate
    cert-manager.io/cluster-issuer: selfsigned-issuer
    kubernetes.io/ingress.class: traefik
spec:
  rules:
  - host: picloud0.pg.us
    http:
      paths:
      - path: /
        pathType: Prefix
        backend:
          service:
            name: hellowebapp
            port:
              number: 80
  #Add this section to have a certificate generated for our given host/FQDN
  tls:
  - hosts:
    - picloud0.pg.us
    secretName: hellowebapp-local-cert
4. Redeploy the application using modified yml file
kubectl -n aspnetcore0 apply -f hellowebapp.yml
5. Verify that new certificate is issued
6. Make chrome accept self signed certificate
https://peacocksoftware.com/blog/make-chrome-auto-accept-your-self-signed-certificate
7. Redirect HTTP to HTTPS
Using Traefik, you can also redirect HTTP to HTTPS. This is again done by modify Traefik configuration as shown below.
kubectl -n kube-system edit cm traefik
    [entryPoints]
      [entryPoints.http]
      address = ":80"
      compress = true
        # Add next two lines to redirect HTTP to HTTPS
        [entryPoints.http.redirect]
        entryPoint = "https"
      [entryPoints.https]
      address = ":443"
      compress = true
Conclusion
At this point, you have an ASP.NET core web application running on Raspberry Pi. This web application is serving traffic over HTTPS and using self-signed certificate. Your browser is also trusting the self-signed certificate. Pretty simple and cool!
As next steps, you can explore cert-manager further to see how to generate LetsEncrypt certificate automatically and be able to serve this website from your Pi to external users over Internet. You would need a valid domain name for that.
Happy hacking!